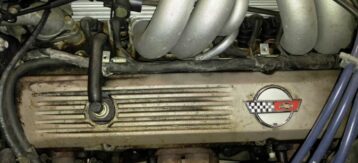
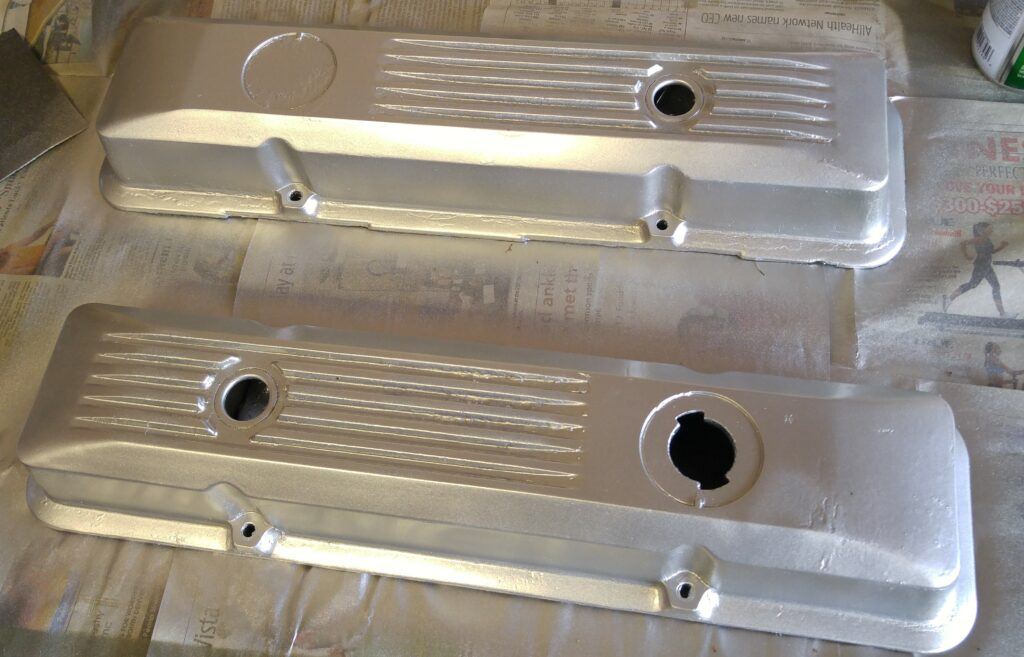
Valve covers a little dirty on your C4 Corvette after all these years? Are your C4 Corvette valve covers peeling and the paint coming off? Want to clean up your engine area and make your Corvette valve covers look better? This is the process I used to clean mine up.
My engine was pretty dirty

When I purchased my 1985 Corvette the engine was kind of a mess. I could see the valve covers were leaking as well as the intake manifold. At the time, I wasn’t sure if I could tackle the intake manifold so I started with the valve covers. If you are like me, and hadn’t really done a lot of engine work, I would suggest knocking out some easy projects first before digging into the more difficult ones. This is really the best way to get started with automotive repair. Removing the valve covers, cleaning them up, putting on new gaskets and putting everything back together is a relatively simple repair. Not too many parts to lose track of or put on the wrong way.
How to remove the valve covers
- Before you begin, mark each of your plug wires, to help you remember where they went, and remove them from the spark plugs wires and retainers, Move them out of the way. Remove the PCV valve hose from the valve cover. NOTE: It’s a good idea to take pictures of they project you are about to do before taking things apart. It’s a common theme on this website but trust me, it can save a lot of headaches.
- For a 1985 Corvette like mine, there are 4 bolts to remove to take off the valve covers. Later C4 Corvettes have them in a different location. Remove the wiring harnesses covers first. Remove the two bolts that hold them in place at the top of each valve cover and gently lift them out of the way. You will then have access to the valve cover’s top two bolts. The valve cover bolts on top and bottom can be removed along with the lower spark plug wire retaining clips.
- Remove the passenger side air inlet tube and oil filler cap. To remove the EGR tube from the intake mounting surface, loosen and remove the two Torx screws. As you rotate the tube slowly towards the firewall, lift the valve cover off the head.
- To help remove the driver side valve cover I recommend removing the windshield wiper cover. A torx T-20 will remove the screws. The passenger side comes off rather easily, plenty of room for that side.
- The valve cover should be removed from the head by lifting it up and removing it with a large flat blade screwdriver. Be careful when prying these valve covers off, since they are cast metal and can easily break or crack.
- Remove the valve covers and examine the return oil holes in the heads. Make sure they are clear, open, and free of oil or sludge buildup. If these holes are blocked, oil will collect in the valve cover and drain, causing the engine to smoke. This can also cause severe valve cover gasket leaks. Check the inside and outside of each valve cover for any deposits.
- Place paper towels or shop rags on the gasket rail to keep debris off of the head while removing the old gasket.
How to clean the valve covers
- You can clean the valve covers thoroughly with mineral spirits and a bucket if you don’t have a parts washer. I picked up a small hand held parts washer that I used with a 5 gallon bucket.
- To remove the old finish, use a quality paint stripper. After the paint stripper has sat according to the manufacturer’s instructions, use a wire brush to remove all of old finish. Clean surfaces produce the best finishes.
- Remove all the old paint and stripper, thoroughly clean the valve covers again and let them dry.
- After they are dry, scuff up the surface slightly with a scuff pad. This will create a better bond between the new and old paint.
- The valve covers are rough in some areas because of the poor casting. Air gets into the casting process, creating bubbles. When the bubbles burst, pits are formed in the valve covers. These pits can be sanded out with a variety of sandpaper grits, but they are extremely difficult to remove.
Make them look like new
- Clean valve cover surfaces with lacquer thinner prior to painting them. Never touch them directly with your bare hands once they’ve been cleaned. Oils from your skin may prevent the paint from adhering properly.
- Use light, overlapping strokes to spray the valve covers. Spray 2 to 4 coats and wait at least 5 minutes after each coat. Alternate directions with every coat. This will give you the greatest coverage. Wait one hour before beginning the reassembly process.
- The PCV valve grommet and the air intake tube grommet should be sprayed with silicone before assembly. The valve cover openings will slide much more easily if you do this. You may install the valve cover emblem at this time. You can purchase a new one or repaint the old one. I had my daughter repaint mine after cleaning it like the valve covers, I think it came out pretty good. The notch on the back of the emblem should align with the elevated guide on the valve cover.

How to put everything back together
- Install new valve cover gaskets. There are several types to choose from. Place the EGR tube shield over the EGR tube. Slide the EGR temperature switch through the hole in the shield.
- Position the passenger-side valve cover on the head. Do not bolt it down yet, as you must now re-install the EGR tube. If you do not have a new gasket, you may use Red RTV Silicone. Clean the mount area of the tube and intake thoroughly. After thoroughly cleaning the mount area, spread a thin layer of RTV Red Silicone. After about five minutes, carefully align the EGR tube with the mounting surface and install the 2 Torx bolts.
- Tighten them into place. Re-connect the EGR temperature switch to the wiring harness.
- Install the PCV valve and hose on the driver’s side grommet and the air inlet tube on the passenger side grommet. Screw the oil filler cap on the passenger side valve cover. Place the plug wire retainer clips on the plug wires.
- Route and reconnect each plug wire to its spark plug using the marks you made at the beginning. Check for tight bolts and wires.
Conclusion
Removing the valve covers, cleaning them up and installing new gaskets is a great way to clean up your engine bay and give it a fresh new look. Your valve covers now look great and no longer appear to be falling apart. Best of all you did the job yourself!
Now you might be ready to tackle some of those more difficult projects. If not, try some additional easy projects.
Have any comments on my process write up? Have better suggestions for completing this clean up? Leave a comment below and I will get back to you quickly.


