5.7 Hemi engine running a little rough? Getting up to 100k miles? Might be time to replace those 16 spark plugs. Yes, these Hemi’s have 2 spark plugs per cylinders. Why? We can go into that detail later but it’s basically a way to make sure these engines emissions meet the legal standards. I just recently replaced the plugs on my 2014 Ram 1500 5.7. I would imagine the process for any 5.7 Hemi engine is basically the same but the pictures below are from the 1500.
Probably the most important thing when working on any vehicle is to have the correct tools. I had a regular 9/16′ spark plug socket. I soon found out it worked fine on the first 3 coil packs on the passenger side but not so much for the last pack by the firewall on the passenger side and just about all the packs on the drivers side. Do yourself a favor and get a magnetic swivel socket. Just this tip alone will save you a ton of time.
Tips before you get started
I personally feel it’s a good idea to read all the instructions first before starting a new project. That way you won’t have any surprises jump up. As I mentioned about this section, the correct tools always make the process go much smoother. Get a magnetic swivel socket. You will need a 10mm socket to remove the coil packs.
Another tip, do each cylinder one at a time. As what happened to me, I ran out of time the first day I started and on got 5 cylinders (10 spark plugs) done. That way if you need to drive the vehicle you still can even if you have some new and old plugs.
Stuff to do before getting to the spark plugs
The first thing you might want to do is clean off your engine. If you have a lot of dirt on top clean it off the best you can to prevent anything you don’t want falling in parts of your engine you don’t want anything. If it’s not that dirty you might just want to blow and dirt off with an air compressor.
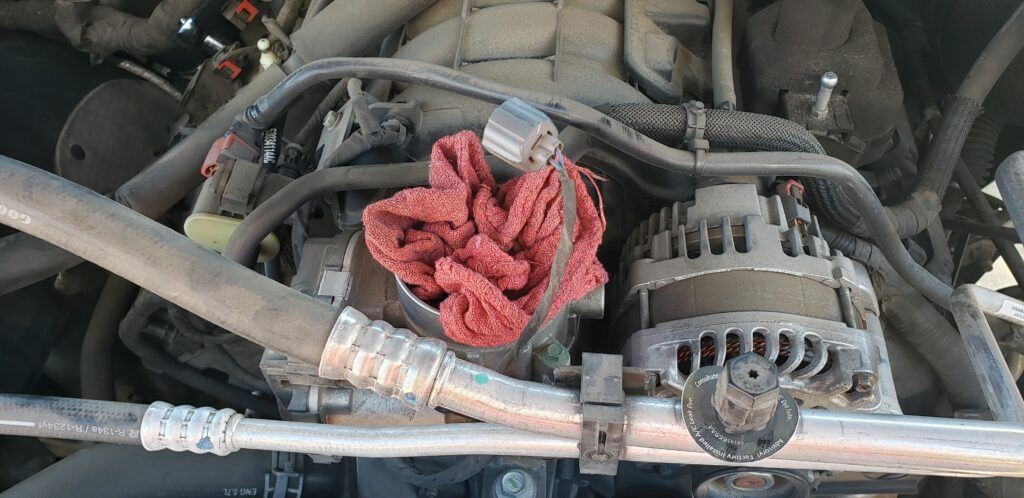
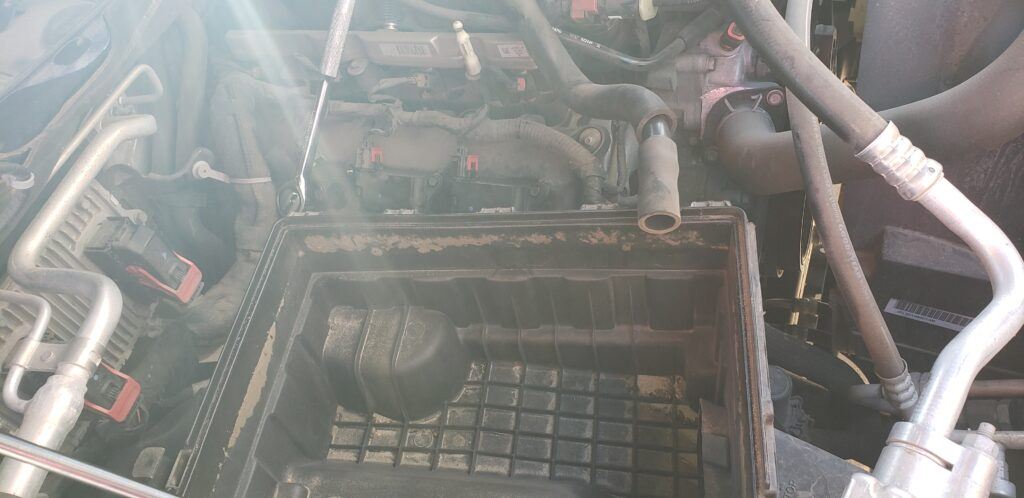
Before starting, notice there are a few things you can get out of your way to help make things easier. First disconnect the sensor from the air hose going from the air filter to the throttle body. Next you can use a flat head screw driver to remove the clamps from each end of the hose. Set the hose aside. Now you can remove the plastic cover. Lift the front of the cover and it should just pop out of its holders. You may need to move the smaller hose around to remove the entire cover. Put something like a rag or paper towel in the throttle body, you don’t want any foreign objects getting into you engine.

With the cover off, remove the top of the air filter cover. There are four or five clips that hold it down. You can then pull it towards you on the passenger side to remove it completely. If you haven’t checked your air filter for a while now is a good time to see if it needs to be replaced. Remove the air filter while working on the spark plugs. The hooks and top of the air filter box can be sharp, I suggest putting a towel or something over the top while working on the passenger side. Your forearms will thank you.
Getting the correct spark plugs
If you do a search for spark plugs for your particular year and model you most likely get a bunch of options come up. Do some research about what you are looking for. Just want to keep the status quo and get what you had? Pull one of your plugs and get the same or similar. Want to spend less money? You can find cheaper plugs but the typically won’t last as long. There are different ones in case you are changing you engine, like adding a supercharger, and you will probably want some that don’t quite burn as hot.
I pulled one of the ones that was currently in my vehicle and purchased the same one.
Remove and replace the spark plugs
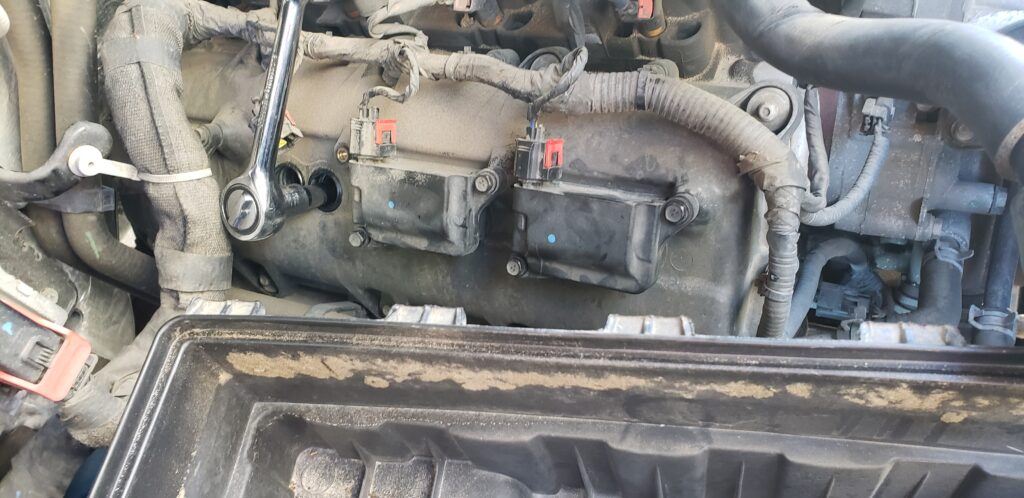
Start with the front coil pack on the passenger side. This side is definitely easier than the drivers side. The first three are pretty easy.
First thing you want to do is undo the electrical clip going to the coil. Lift up on the red clip first. You can use a fingernail or a screw driver, just be sure not to push to hard and lick it off somewhere. Then using a screw driver or something similar, push in the bottom of the clip and lift up to remove from the coil. Grab your 10mm ratchet and remove the two bolts holding the clip down. Once those are removed, lift the coil carefully from the engine block and set aside. Its now a good idea to blow out the openings where the spark plugs are. You don’t want any dust or dirt getting down in the engine while doing this replacement. I used my air compressor I have in my garage. If you don’t have one you can get a can of compressed air to use.
Using a spark plug socket, a ratchet and extension, remove the first spark plug. It shouldn’t be too difficult to get the spark plug started to remove. Once the spark plug is out it’s time to put in the new one. Like I mentioned before, I recommend doing one spark plug at a time in case you need to stop and drive your vehicle.

Now get your new spark plug. I recommend using some dielectric grease on your threads and on the bottom of the coils. It just helps with corrosion but don’t use too much, just a light amount it fine.
Now using your hand, get the spark plug started and make sure it screws in easily. If it does not you should remove it and try again. Not one of my 16 I replaced screwed into the engine with anything more than an easy hand turn until it got down to the bottom of the threads. Check the instructions on the spark plug box for the tightening instructions. You should see a recommendation for how much to turn the plugs down using a ratchet. It will also say the amount of pound torque to apply. What tools you have available will dictate which method you use. My torque wrench is a large one so it was had to get into the last plugs on the passenger side up by the fire wall and pretty much the whole drivers side so I just did the amount of additional turns recommended on the box without any problems.
Continue doing the rest of the coils on the passenger side before you move to the drivers side. The first 3 are pretty easy but the one next to the firewall is the hardest. You may need to undo the wire harness on the firewall. Once again the pivot magnetic plug remover works wonders in give enough room to get the plug out and the new one in.
Drivers side is a little more difficult. The clips to remove from the coil pack faces the back not the front. Still not terribly hard but not as easy as when they faced forward on the passenger side. As mentioned, that pivot plug ratchet comes in real handy on this side. The brake booster is right in the way and the pivot with the magnet instead of the regular rubber plug will save you a lot of time and headaches.
Conclusion
As is usually the case, its important to have the right tools for the job. Getting yourself a magnetic swivel socket will make this job pretty easy. It will take some time 3-4 hours depending on how fast you work. Replacing spark plugs are a pretty cheap and easy way to make sure your vehicle is running as its best. With the uncertanty of gas prices a clean running car will help you save money.
Comments or issues with the spark plug instructions? Leave a comment or concern below and I’ll get back to you.


